Kenmore Washer 70 Series Manual: A Comprehensive Guide
This manual offers detailed guidance for Kenmore 70 Series washers, including parts lists and diagrams for models like #110.92273100.
It’s a valuable resource for repair, service, and understanding over 100 components, plus necessary paints and lubricants.
Published on July 26, 2025, this 18-page document has been viewed 24K times and received positive user feedback.
Understanding the 70 Series
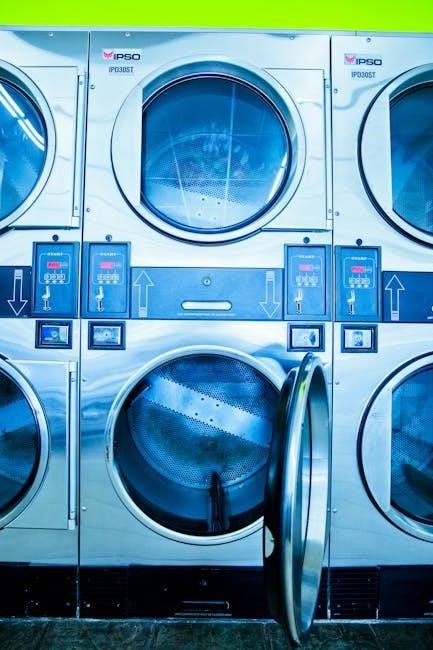
The Kenmore 70 Series washers represent a line of heavy-duty, top-load washing machines designed for reliable performance and durability. These models, exemplified by the 110.92273100, are built to handle substantial laundry loads efficiently. Understanding the series involves recognizing its core components and the robust construction that characterizes Kenmore appliances.
This series often features a traditional agitator design, providing powerful cleaning action. The machines are engineered for straightforward operation, though detailed knowledge of their parts – over 100 individual components – is crucial for effective maintenance and repair. The availability of exploded parts lists and diagrams, as found in resources published in July 2025, significantly aids in comprehending the washer’s internal structure.
Furthermore, the 70 Series benefits from readily available repair information, including guidance on necessary paints, lubricants, and supplies. This accessibility empowers both DIY enthusiasts and professional technicians to maintain these washers, ensuring their longevity and optimal functionality. Knowing the series’ strengths and available support is key to maximizing its value.
Identifying Your Specific Model Number
Locating your Kenmore 70 Series washer’s model number is crucial for accessing the correct documentation, parts, and support. This number uniquely identifies your specific machine, ensuring compatibility when ordering replacements or consulting repair manuals. The model number is typically found on a label affixed to the appliance.
Common locations include the inside of the lid, the back panel, or near the washer’s base. For the 70 Series, a frequently cited example is 110.92273100. This alphanumeric code provides vital information about the washer’s features and manufacturing specifications.
Resources like the document published on July 26, 2025, specifically utilize model numbers to categorize parts lists and diagrams. Accurate identification prevents ordering incorrect components and streamlines the repair process. Always verify the model number before seeking assistance or purchasing parts to guarantee a proper fit and function.
Safety Precautions and Warnings

Prioritizing safety is paramount when operating and maintaining your Kenmore 70 Series washer. Always disconnect the power supply before attempting any repairs or internal inspections. Failure to do so presents a significant risk of electric shock.
Never operate the washer if the cabinet is damaged, or if water is leaking. Inspect hoses regularly for cracks or wear, and replace them promptly. Keep children and pets away from the washer during operation, as moving parts can pose a hazard.
Refer to the complete manual for detailed safety guidelines, as this overview is not exhaustive. Improper use or maintenance can lead to injury or damage to the appliance. The document available as of July 26, 2025, likely contains comprehensive safety instructions specific to your model.
Operating Instructions
The Kenmore 70 Series manual details proper washer use, covering loading, detergent dispensing, cycle selection, and water temperature adjustments for optimal cleaning.
Loading and Unloading the Washer
Proper loading is crucial for effective cleaning and preventing damage to your Kenmore 70 Series washer. Always distribute items evenly around the agitator to maintain balance during the wash cycle. Avoid overloading, as this restricts movement and reduces cleaning performance; consult the manual for recommended load sizes.
Before loading, check pockets for objects like coins or keys that could damage the washer. Separate delicate items and place them in a mesh laundry bag for protection. When unloading, remove items promptly to prevent mildew growth and wrinkles.
Ensure the washer is completely stopped before attempting to open the lid. Be mindful of hot water and potential detergent residue during unloading. Following these guidelines will ensure safe and efficient operation of your Kenmore washer.
Detergent Dispenser Guide
The Kenmore 70 Series washer features a detergent dispenser designed for optimal cleaning performance. It typically includes compartments for pre-wash detergent, main wash detergent, and fabric softener. Always use High Efficiency (HE) detergent specifically formulated for HE washers to prevent excessive sudsing.
Refer to your detergent’s packaging for recommended dosage amounts based on load size and soil level. Fill each compartment to the indicated maximum fill line. Avoid overfilling, as this can cause detergent to dispense prematurely.
Regularly clean the dispenser to prevent buildup and ensure proper function. A clogged dispenser can lead to detergent residue on clothes. Consult the maintenance section of this manual for detailed cleaning instructions.
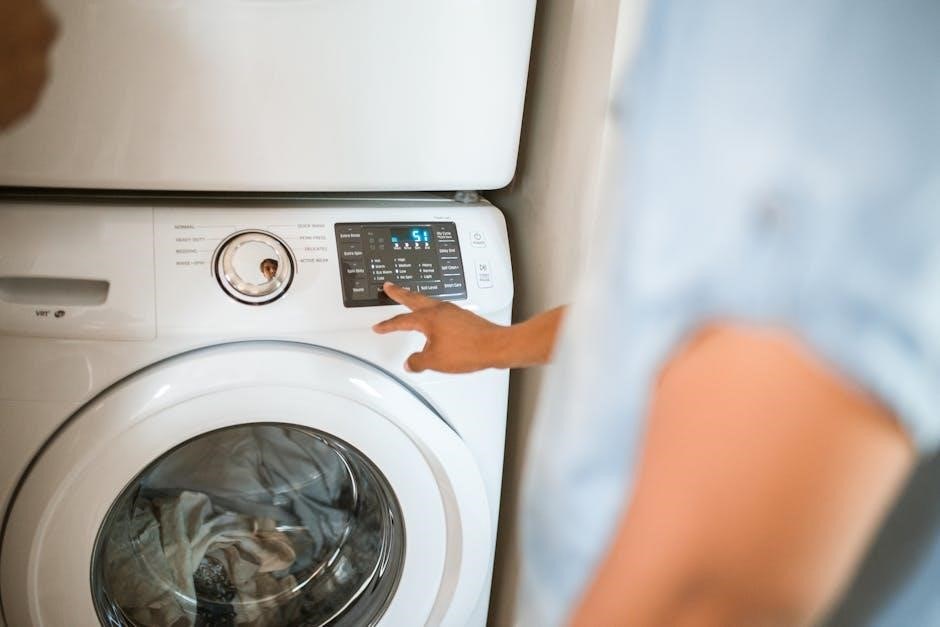
Wash Cycle Selection
The Kenmore 70 Series washer offers a variety of wash cycles to accommodate different fabric types and soil levels. Common cycles include Normal, Delicates, Heavy Duty, Quick Wash, and Bulky Items. Carefully select the cycle that best suits your laundry needs for optimal results and fabric care.
The Normal cycle is ideal for everyday laundry, while Delicates is recommended for fragile items. Heavy Duty provides extra cleaning power for heavily soiled clothes. Quick Wash offers a shorter cycle for lightly soiled items, and Bulky Items is designed for larger loads like comforters.

Consult the garment care labels before selecting a cycle. Incorrect cycle selection can damage fabrics. Experiment with different cycles to find what works best for your laundry habits.

Water Temperature Settings
Your Kenmore 70 Series washer provides several water temperature options to ensure proper cleaning and fabric protection. These typically include Hot, Warm, and Cold settings. Selecting the appropriate temperature is crucial for effective stain removal and preventing damage to your clothes.
Hot water is best for whites and heavily soiled items, as it provides the most effective cleaning. However, it can cause colors to fade and some fabrics to shrink. Warm water is a good all-purpose option for most loads, offering a balance between cleaning power and fabric care.
Cold water is ideal for delicate fabrics, bright colors, and preventing shrinking. Always check garment care labels for specific temperature recommendations. Using cold water also saves energy!
Troubleshooting Common Issues
Addressing problems like a washer that won’t start, won’t drain, leaks, or vibrates excessively is crucial for maintaining optimal performance and longevity.
Washer Won’t Start
If your Kenmore 70 Series washer fails to start, several potential issues could be the cause. First, verify the power supply – ensure the washer is properly plugged into a functioning outlet and that the circuit breaker hasn’t tripped.
Check the lid switch; this safety feature prevents operation when the lid is open. A faulty lid switch will need replacement. Inspect the control panel for any error codes displayed, as these can pinpoint the problem.
Examine the motor overload protector, which may have tripped due to overheating. Allow it to cool before attempting to restart. Consult the manual’s parts diagrams (like those for model #110.92273100) to locate these components for inspection and potential repair or replacement. If issues persist, professional service is recommended.
Washer Not Draining
A Kenmore 70 Series washer that won’t drain typically indicates a blockage or a malfunctioning drain pump. Begin by checking the drain hose for kinks or obstructions. Ensure it isn’t excessively bent or clogged with lint or debris.
Crucially, consult the manual’s exploded views (referencing models like #110.92273100) to locate and carefully clean the drain pump filter. This filter often accumulates small items and lint, hindering drainage.
Inspect the drain pump itself for any signs of damage or malfunction. A faulty pump may require replacement. Verify that the washer’s control panel isn’t displaying any error codes related to drainage. If the problem continues, professional assistance may be necessary to diagnose and resolve more complex issues.
Leaking Water
Water leaks from a Kenmore 70 Series washer can stem from several sources. First, inspect the water inlet hoses connected to the back of the machine for cracks or loose connections. Tighten connections and replace damaged hoses immediately.
Next, examine the drain hose and its connection to the washer and drainpipe. Ensure a secure fit. Refer to the parts diagrams (like those for model #110.92273100) to identify the tub and agitator assembly, checking for cracks or damage.
Leaks can also originate from the pump or internal hoses. If you suspect an internal leak, carefully inspect the pump and surrounding areas. Consult the manual’s exploded views to locate and assess these components. If the leak persists, professional repair is recommended to prevent further damage.
Excessive Vibration
Significant shaking during operation with your Kenmore 70 Series washer often indicates an imbalance. Ensure the washer is level on the floor; adjust the leveling feet as needed. Avoid overloading the machine, as this can exacerbate vibrations.
Check the load distribution within the tub, redistributing items if necessary. Refer to the parts diagrams (specifically the tub and agitator assembly, as found in model #110.92273100 documentation) to verify the agitator is securely attached and undamaged.
Worn shock absorbers or suspension rods can also cause excessive vibration. Inspect these components for wear and tear, utilizing the exploded views in the manual for location and identification. If replacement is needed, consult the parts list to ensure compatibility and order the correct parts.

Maintenance and Care
Regular cleaning and upkeep are crucial for optimal performance of your Kenmore 70 Series washer, extending its lifespan and efficiency.
Follow the manual’s guidance for cleaning, filter checks, and winterizing procedures to maintain peak functionality.
Cleaning the Washer
Maintaining a clean washing machine is essential for preventing odors, mold growth, and ensuring optimal performance of your Kenmore 70 Series washer.
Regularly wipe down the exterior surfaces with a damp cloth and mild detergent to remove dust and spills.
For the interior drum, run an empty wash cycle with hot water and a washing machine cleaner (or a cup of white vinegar) every month.
This helps to dissolve detergent buildup and sanitize the drum.
Pay attention to the rubber gasket around the door (if applicable), as this area can trap moisture and mildew.
Clean it thoroughly with a damp cloth and a mild bleach solution (diluted appropriately) to prevent mold.
Always ensure the washer is completely empty before initiating a cleaning cycle.
Refer to your specific model’s manual for any additional cleaning recommendations or precautions.
Cleaning the Detergent Dispenser
The detergent dispenser requires regular cleaning to prevent clogs and ensure proper detergent distribution in your Kenmore 70 Series washer.
Remove the dispenser drawer by locating and pressing the release tab (consult your model’s manual for specific instructions).
Rinse the dispenser thoroughly under warm water to remove any residual detergent or fabric softener.
Use a soft brush (like an old toothbrush) to scrub away any stubborn buildup in the compartments and nozzles.
For heavily soiled dispensers, soak them in a solution of warm water and vinegar for about 30 minutes before scrubbing.
Ensure all compartments are completely dry before reinserting the drawer.
Periodically check the dispenser housing within the washer for any accumulated residue and clean it as needed.
A clean dispenser contributes to efficient washing and prevents detergent-related issues.
Checking and Cleaning the Drain Pump Filter
Regularly checking and cleaning the drain pump filter is crucial for maintaining optimal performance of your Kenmore 70 Series washer.
The filter traps lint, debris, and small objects preventing drain blockages and potential damage to the pump.
Locate the drain pump filter access panel (refer to your specific model’s manual for its location – typically at the front, bottom of the washer).
Place a shallow pan or towels beneath the access panel to catch any spilled water.
Carefully open the access panel and unscrew the filter cap.
Remove the filter and clean it thoroughly under running water, removing all accumulated debris.
Inspect the filter for any damage and replace it if necessary.
Reinstall the filter securely and close the access panel.
This preventative maintenance ensures efficient draining and prolongs the life of your washer.
Winterizing Your Washer
Protecting your Kenmore 70 Series washer during freezing temperatures is essential to prevent costly damage. If the washer is located in an unheated area, such as a garage or basement, winterizing is crucial.
First, disconnect the water supply hoses from the washer and drain any remaining water from them.
Next, pour a generous amount of RV antifreeze (propylene glycol-based) into the drain pump and washer tub.
Run a short rinse cycle to distribute the antifreeze throughout the system, protecting hoses and internal components.

Wipe down the exterior of the washer and leave the door slightly ajar to prevent mildew growth.
Ensure all connections are dry before storing or leaving the washer unused for an extended period.
This simple process will help safeguard your appliance against freezing damage.

Parts Diagrams and Exploded Views
Detailed diagrams showcase over 100 Kenmore 70 Series parts, including the control panel, tub, and motor assembly, aiding repair and maintenance efforts.
Control Panel Components
The Kenmore 70 Series washer’s control panel is a central hub, featuring numerous components essential for operation. Detailed exploded views, as found in the referenced manual (model #110.92273100), illustrate each part clearly.
Key components include the timer, which governs cycle selection and duration, and various control knobs for adjusting settings like water temperature and spin speed. The manual identifies specific part numbers for these controls, facilitating accurate replacements during repairs.
Additionally, the panel houses the start/pause button, cycle selector switch, and indicator lights displaying the current wash status. Understanding the function of each component, aided by the diagrams, is crucial for troubleshooting and maintaining optimal washer performance. The document provides a comprehensive breakdown, ensuring even complex repairs are manageable.
Tub and Agitator Assembly
The Kenmore 70 Series washer’s tub and agitator assembly are critical for the washing process, and the manual (model #110.92273100) provides detailed exploded views of these components. The tub, responsible for holding the laundry and water, is shown with all associated parts clearly labeled.
The agitator, central to the washing action, is also thoroughly illustrated, with individual parts like the agitator dogs and fins identified by their specific part numbers. This level of detail is invaluable for repairs, ensuring the correct replacement parts are used.
The manual showcases the connection points and relationships between the tub, agitator, and supporting structures, aiding in reassembly. Understanding this assembly is key to addressing issues like excessive vibration or ineffective cleaning, as outlined in the document’s comprehensive parts list.
Motor and Pump Assembly
The Kenmore 70 Series washer’s motor and pump assembly, detailed in manual #110.92273100, are essential for both agitation and water removal. The exploded diagrams clearly illustrate the motor’s components, including the windings, brushes, and mounting brackets, all individually numbered for easy identification during repair.
The pump assembly, responsible for draining the washer, is similarly depicted with labeled parts like the pump housing, impeller, and inlet/outlet connections. This detailed breakdown is crucial for troubleshooting draining issues, a common problem addressed in the manual’s troubleshooting section.
The manual highlights the relationship between the motor and pump, showing how they connect and function together. This visual guide, alongside the comprehensive parts list, simplifies maintenance and ensures accurate replacement of worn or damaged components.